User guide
This guide provides a step-by-step walkthrough to help you launch and manage your GPU instance efficiently, allowing you to customize your environment and minimize running costs.
Steps to Use
1. Select a GPU
Begin by selecting a GPU from the available list that best suits your project requirements. Consider the following when making your choice:
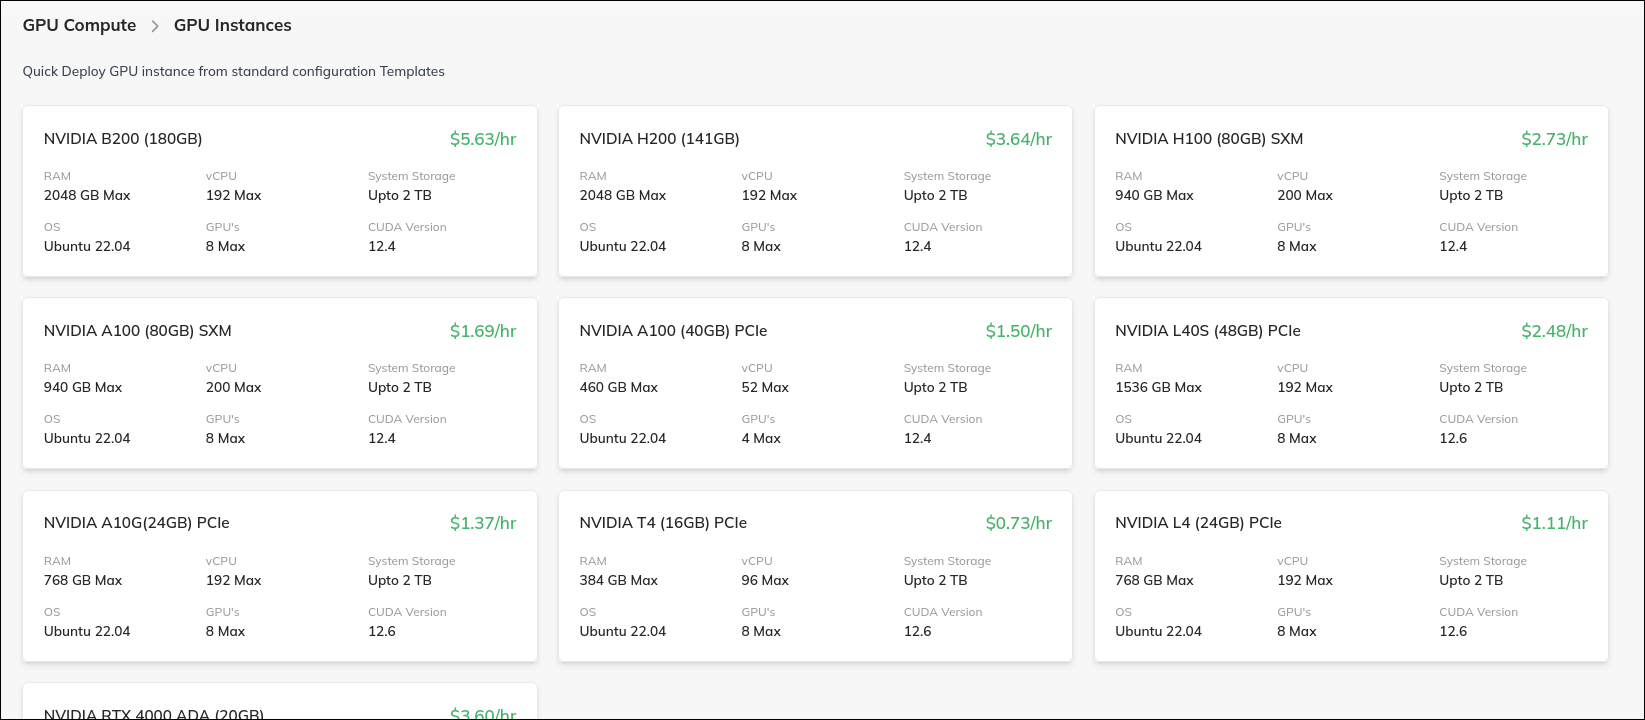
- GPU Model: Different models such as NVIDIA RTX-series, Tesla, or others offer varying performance levels.
- Memory Capacity: Ensure the GPU has enough VRAM for your workload.
- Compute Power: Look at CUDA cores, tensor cores, or other specs important for your tasks.
- Pricing: Compare hourly costs to fit your budget.
Choosing an appropriate GPU is critical for ensuring that your project runs efficiently.
2. Choose or Modify a Template
Next, you will be directed to a page where you can choose a pre-configured template or customize one to match your needs by clicking change Templates. Templates contain software stacks and environment settings specific to various workflows. Examples include:
- TensorFlow: A setup optimized for machine learning and deep learning projects.
- Ubuntu: A clean, general-purpose Linux environment that you can tailor as needed.
- Langflow: A template designed for language processing workflows.
You can select the template as-is or modify configurations such as installed packages, environment variables, and startup scripts to better fit your tasks.
3. (Optional) Enable SSH Access
If you want secure command-line access to your instance, you can enable SSH access:
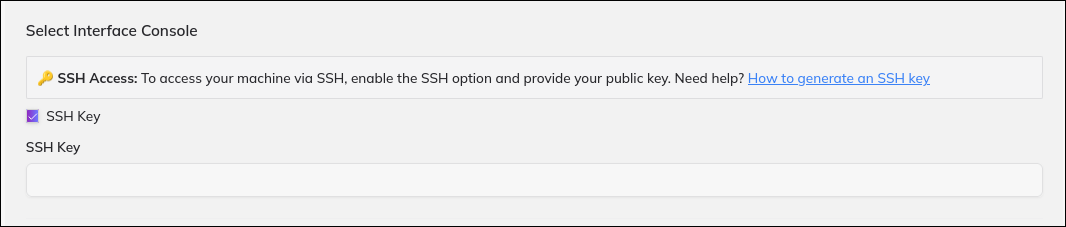
- Provide your SSH public key to allow secure login.
- This lets you connect remotely and manage files, run commands, or configure your instance.
- If you do not want to enable SSH, you may continue with the platform’s default access options.
Adding SSH access enhances flexibility for advanced users needing remote command-line control.
4. Set Autostop Time
To avoid incurring unnecessary charges when your instance is idle:
- Specify an autostop duration such as 1 hour, 4 hours, or a custom timeframe.
- After this time elapses, the instance will automatically shut down.
- This feature helps control costs by ensuring resources are not consumed unintentionally.
Setting an autostop timer is a good practice to optimize resource utilization and budget management.
5. Click Launch and Begin Your Work
Once you’ve completed the above steps:
- Click the Launch button.
- The instance will initialize using your chosen GPU and template settings.
- You can start working immediately on your project.
- Monitor the instance’s status and manage it via the user dashboard.
Additional Recommendations
- Backup important data frequently.
- Monitor resource usage to optimize performance.
- Customize templates further as needed for specialized workflows.
- Contact support if you need help during setup or operation.
- Join our
Discord Groupto connect with the community and share your feedback directly or email us atdigital@qubrid.com.
- Join our
Following these steps will enable you to set up a tailored and cost-effective GPU-powered instance quickly and efficiently.