User guide
This guide provides a detailed process to deploy and interact with Hugging Face text-generation models using Qubrid AI’s cloud platform with on-demand GPUs.
Pre-requisites
Before you start, ensure the following conditions are met:
1. Hugging Face Account
- You must have a
Hugging Face accountto access public or private models.
2. Model Access
- You can deploy:
- Your own custom-trained models, or
- Official open-source models from Hugging Face, given proper licensing.
Finding the Model Name
- Model names are crucial for deployment.
- To find the model name:
- Log in to Hugging Face.
- Go to the "Models" section.
- Search or browse for your model; click on it.
- The URL displays the name in the form:
username/model-name(e.g.,deepseek-ai/DeepSeek-R1).
3. API Token
-
Obtain an authenticated Hugging Face access token (required for private models or programmatic deployment):
- Log into Hugging Face.
- Click your profile → "Settings" → "Access Tokens".
- Create a new token (give it a name/description, set correct permissions).
- Copy and keep your token secure.
Do not share your token. If lost, revoke and create a new one.
4. Certification Requirements
- Ensure your model meets any required certifications or compliance standards needed for deployment.
Step-by-Step Deployment on Qubrid AI
1. Access Model Studio
- Log into Qubrid AI.
- Navigate to the Model Studio and select Hugging Face Models.
2. Add Your Model
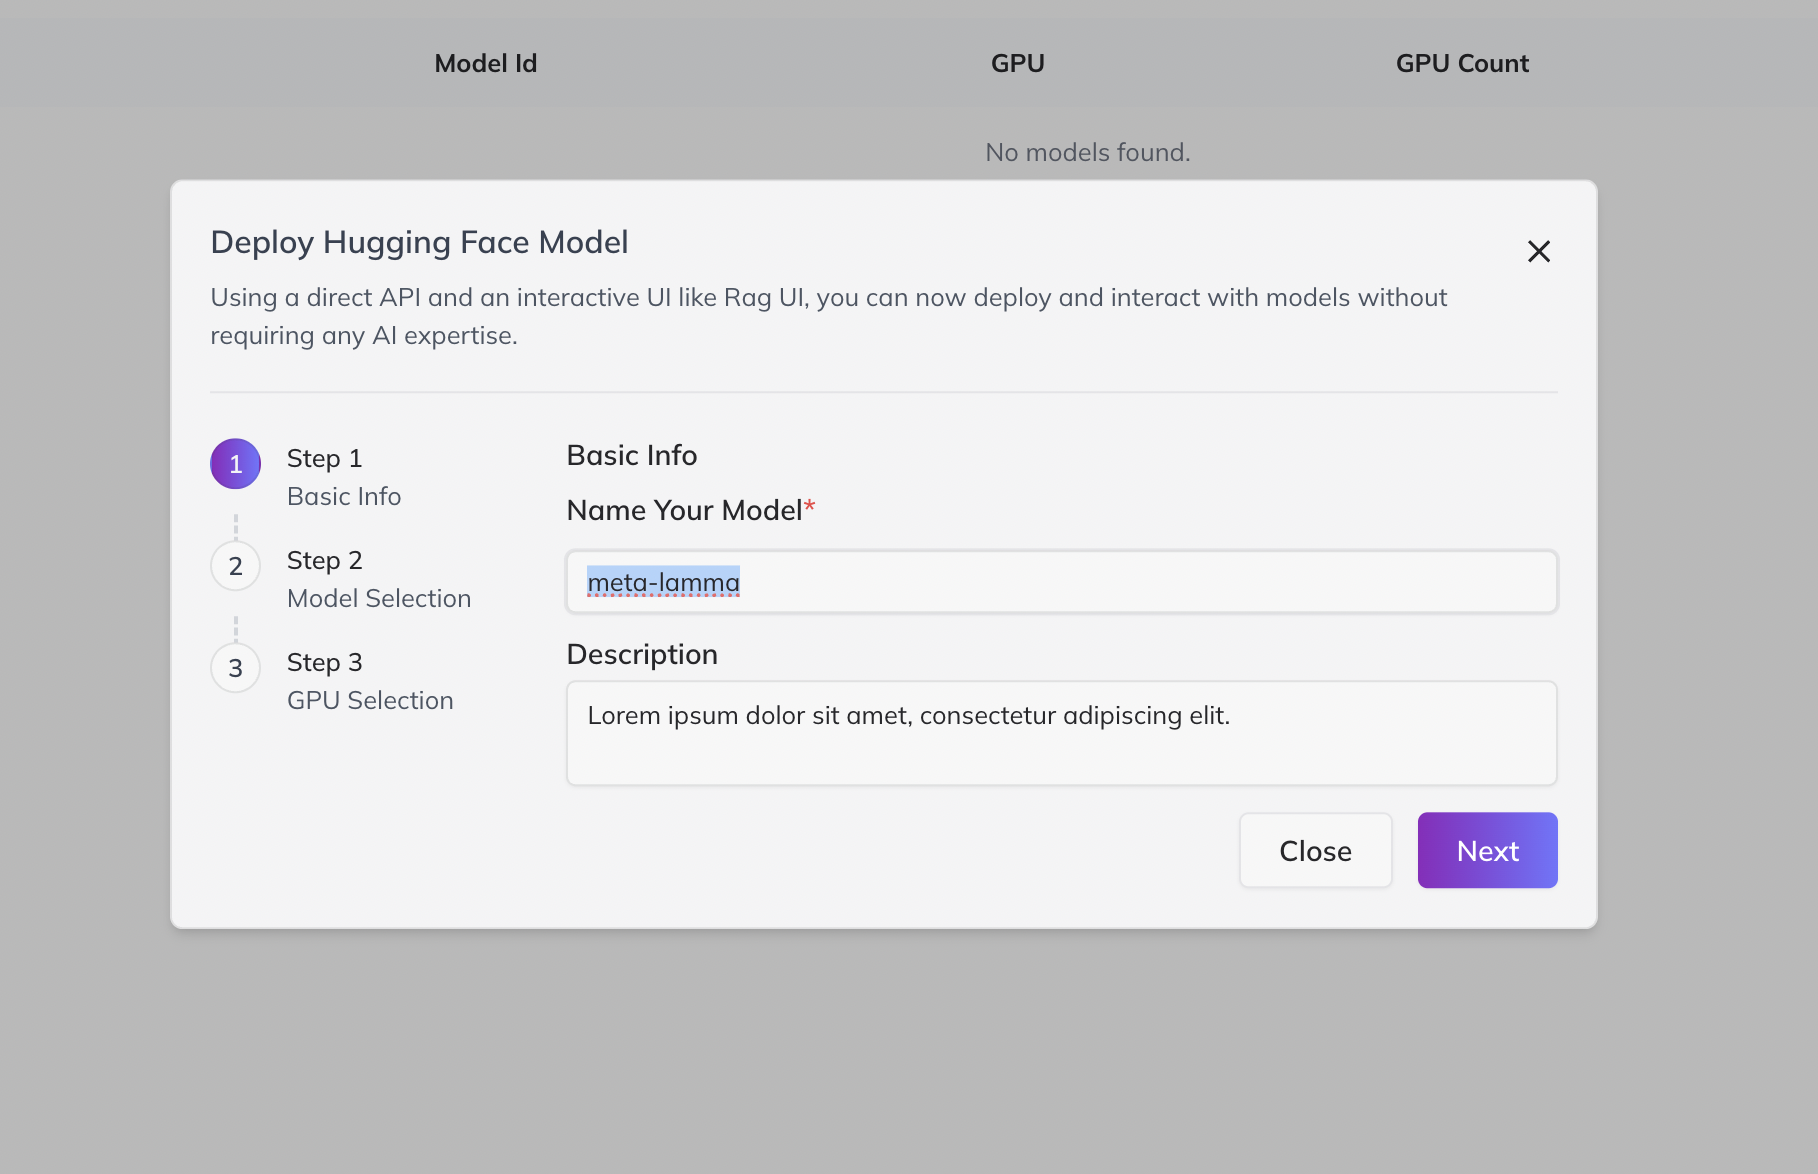
- Click “Add Model”.
- Enter a clear, unique Name and (optionally) a description for easy identification.
3. Link Your Model
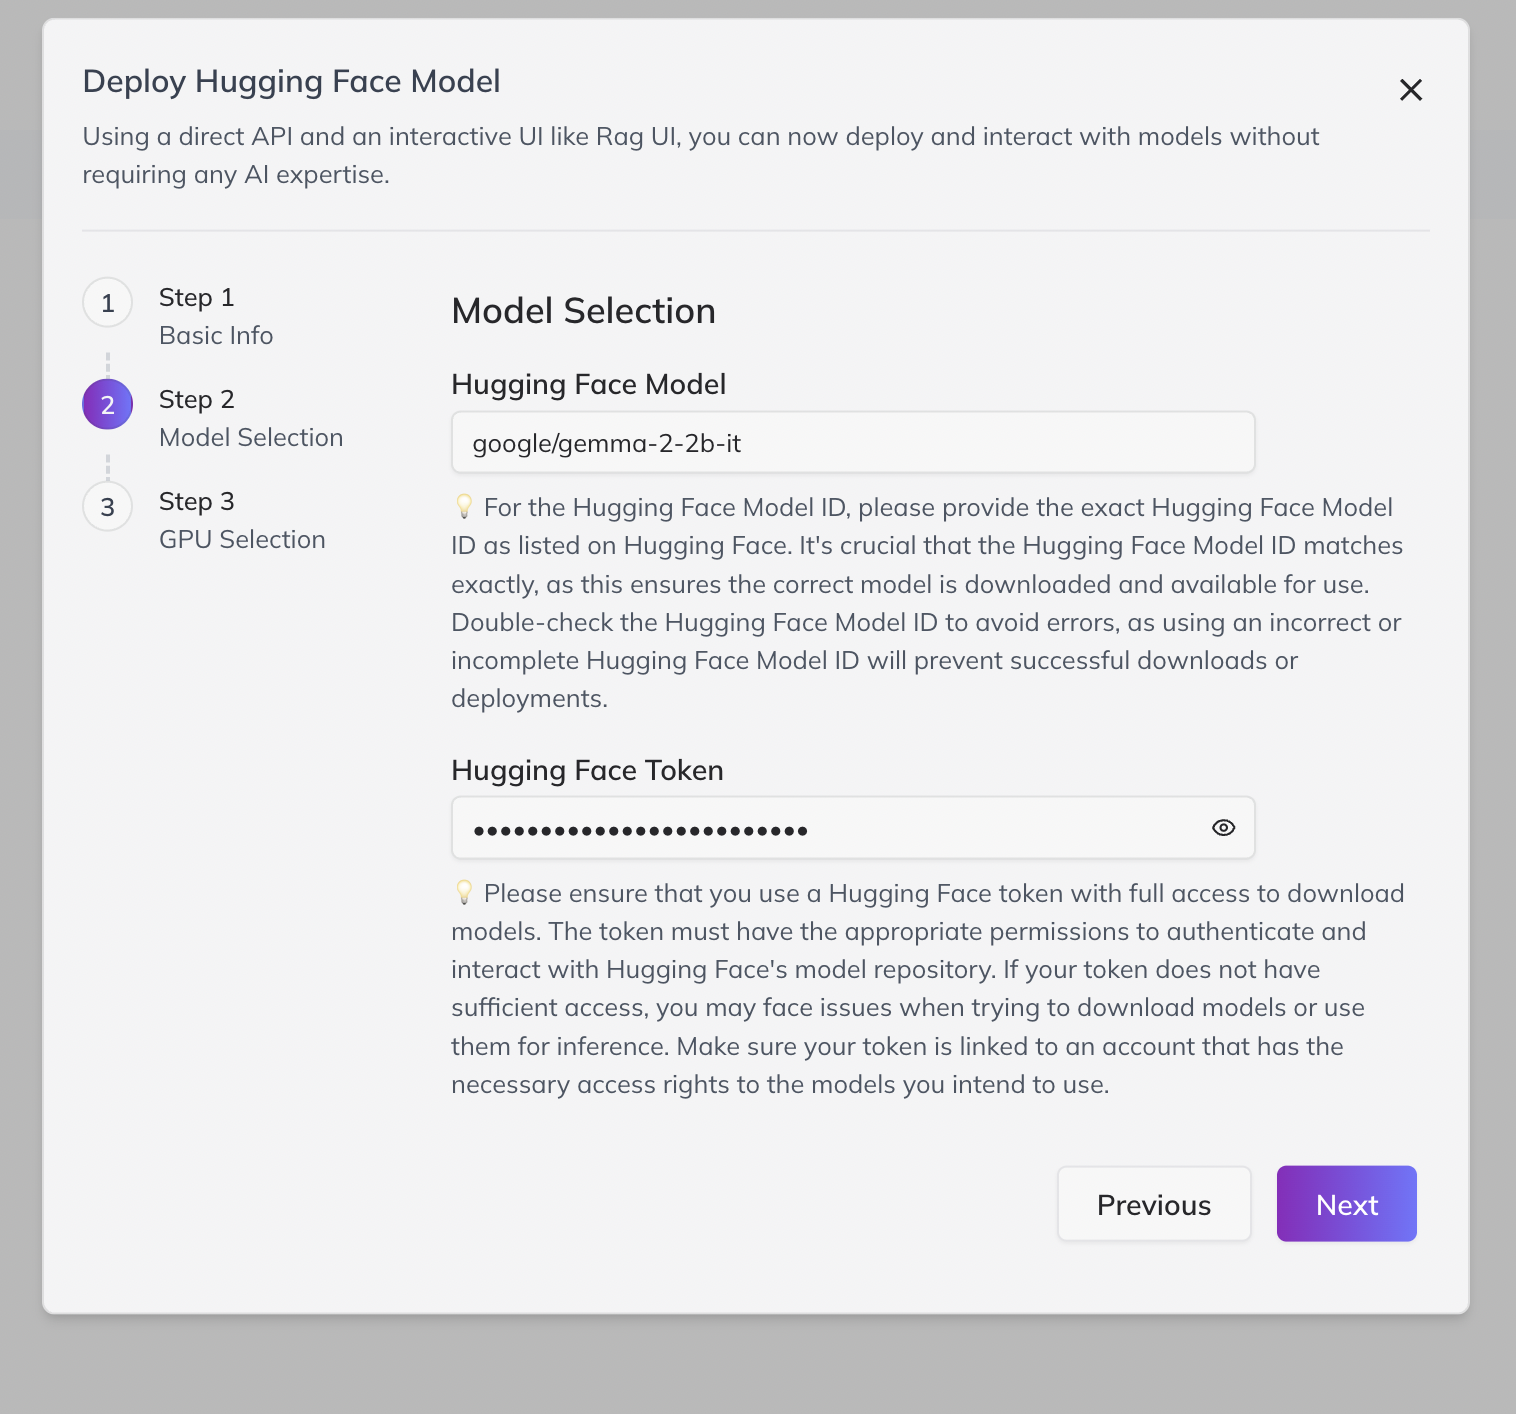
-
Paste the Hugging Face model link (e.g.,
https://huggingface.co/deepseek-ai/DeepSeek-R1) and the API token for access. -
Wait for token verification to ensure successful connection.
- If access fails, confirm you copied the whole model name and used a valid token with necessary permissions.
Guidance on Model Size & GPU Selection (A10G)
| GPU Configuration | Max Model Size | Typical Usage |
|---|---|---|
| 1 × A10G (24GB) | Up to 20B parameters | Small-to-midsize models, fast deployment |
| 4 × A10G (96GB) | Up to 90B parameters | Large, advanced models |
| 8 × A10G (192GB) | Up to 180B parameters | Largest models, maximal compute capacity |
- Choose GPU count based on your model’s parameter size.
4. Select GPU Resources
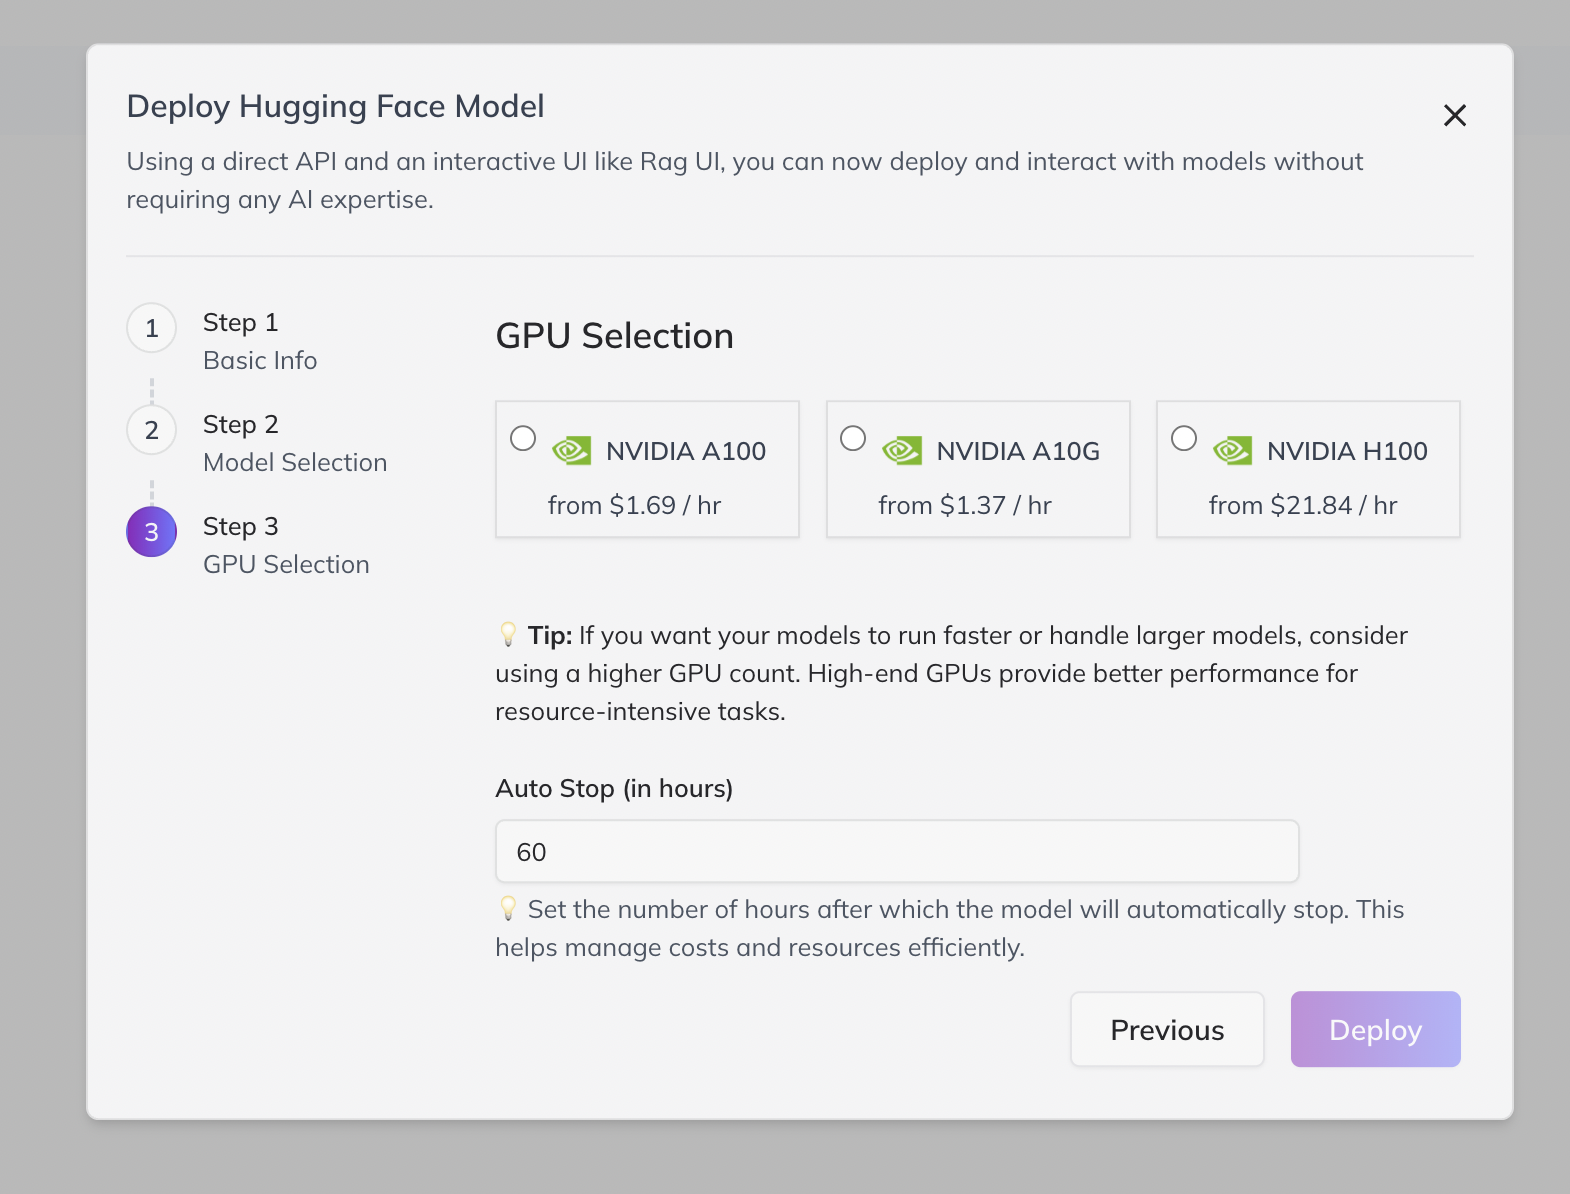
- Select desired GPU count and configure the auto-stop timer (to auto-shutdown after a specified number of hours—helps control costs).
- Click “Deploy”. Deployment time depends on model size (plan for at least 15 minutes for large models).
- Note: Each A10G GPU instance is billed at $1.41/hour.
5. Monitor Deployment
-
Track status from your dashboard. The process will display progress stages such as:
- Deployment in progress
- Model loading
- Deployment ready
-
Only begin further actions once the status shows Deployment Ready.
6. Interact with Your Model
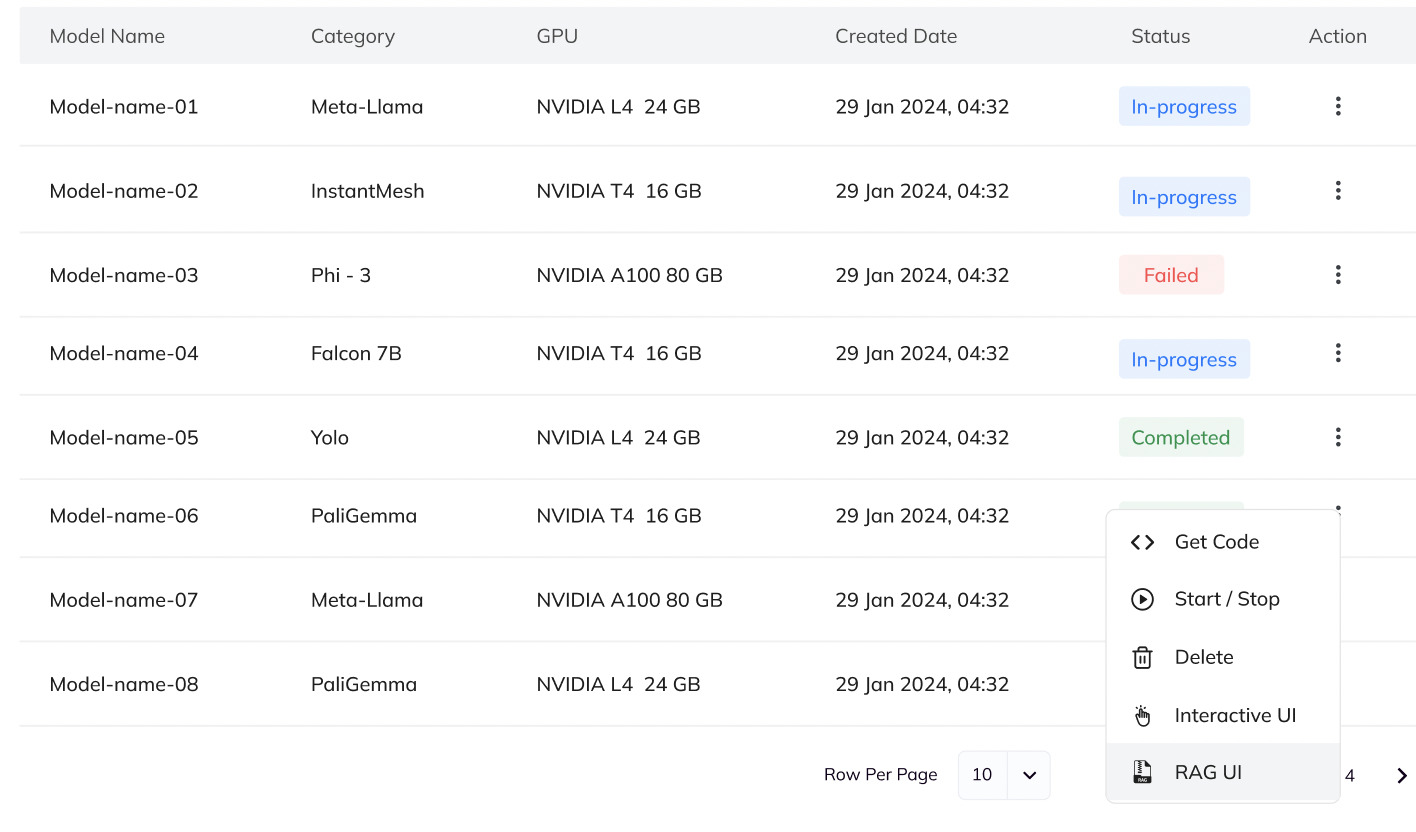
- Click the Actions button (available for each deployed model).
- Access options like:
- Edit Auto-Stop: Modify shutdown time.
- Stop: Temporarily halt deployment.
- Get Code: Retrieve code for CLI, Python, or React integration.
- Interactive UI: Browser-based prompt/parameter testing.
- RAG UI: Retrieval-augmented document chat.
- View Logs: Review deployment logs.
- Delete: Remove deployment.
7. Retrieve Integration Code ("Get Code")
- Under Actions, select Get Code:
- Generate ready-to-use snippets for command-line (cURL), Python scripts, or React apps.
- Use these for quick model integration into your pipelines or apps.
8. Interactive UI
- Use the Interactive UI:
- Fine-tune model prompts and adjust parameters via the left panel.
- No coding required—ideal for iterative experimentation.
9. Retrieval-Augmented Generation (RAG UI)
- Use the RAG UI to upload document(s) (PDF, etc.) and query them with your deployed model:
- Under Actions, pick RAG UI, upload documents, and wait for parsing/indexing.
- Use the chat interface to ask document-related questions.
- Get real-time, context-aware answers.
10. Edit Auto-Stop
- Adjust instance auto-shutdown timer anytime to control usage.
11. View Logs
- Access View Log to debug, troubleshoot, or track deployment actions.
12. Stop/Start Deployment
- Stop: Immediately pause deployment to reduce costs.
- Start again when you need to interact with the model.
13. Delete Deployment
- Delete the model (action irreversible) to free resources and remove it from your workspace. Confirm deletion when prompted.
Additional Tips
- Keep credential tokens confidential.
- Monitor instance duration and cost using the dashboard.
- Regularly check deployment logs for possible errors or warnings.
- Always shut down or delete idle instances to optimize costs.
- Join our
Discord Groupto connect with the community and share your feedback directly or email us atdigital@qubrid.com.
- Join our
By following these elaborated steps, you’ll be able to deploy, manage, and interact with Hugging Face instruct-type models on Qubrid AI, leveraging powerful on-demand GPUs with full integration flexibility and easy post-deployment workflows.