Generate Stunning AI Images with Qubrid’s ComfyUI Template – Step-by-Step Guide

How to Configure ComfyUI Template on a GPU Instance for Text-to-Image Generation
Learn how to deploy the ComfyUI Template on Qubrid AI to generate stunning AI images —
a step-by-step tutorial by Abhijit Mandal, AI Engineer at Qubrid.AI.
This tutorial walks you through how to configure ComfyUI Template on a GPU Instance and use it to generate images with text-to-image models.
ComfyUI is a node-based graphical interface for creating AI image generation workflows. Instead of writing code, you connect different components visually to build custom image generation pipelines. This approach provides flexibility to experiment with various models and techniques while maintaining an intuitive interface.
This tutorial uses the stable-diffusion-v1–5 model for the Image generation,
It’s a legacy model from stabilityai, for the sake of keeping this tutorial
simple and easy to get started with the ComfyUI Template we’ve chose it but
you can adapt these instructions for any model/template combination you want to use.
When you’re just getting started with ComfyUI, it’s important to use a workflow that was created for the specific model you intend to use. You usually cannot simply switch the Load Checkpoint node from one model to another and expect optimal performance or results. For example, if you load a workflow created for the Flux Dev model and try to use it with SDXL-Turbo, the workflow may run, but with poor speed or image quality.💡
What you’ll learn
In this tutorial, you’ll learn how to:
- Deploy a ComfyUI Template.
- Connect to the ComfyUI web interface.
- Create/Load the workflow.
- Install new models to your instance.
- Generate an image.
Requirements
Before you begin, you’ll need:
- A Qubrid account.
- At least $10 in wallet credits.
- A basic understanding of AI image generation.
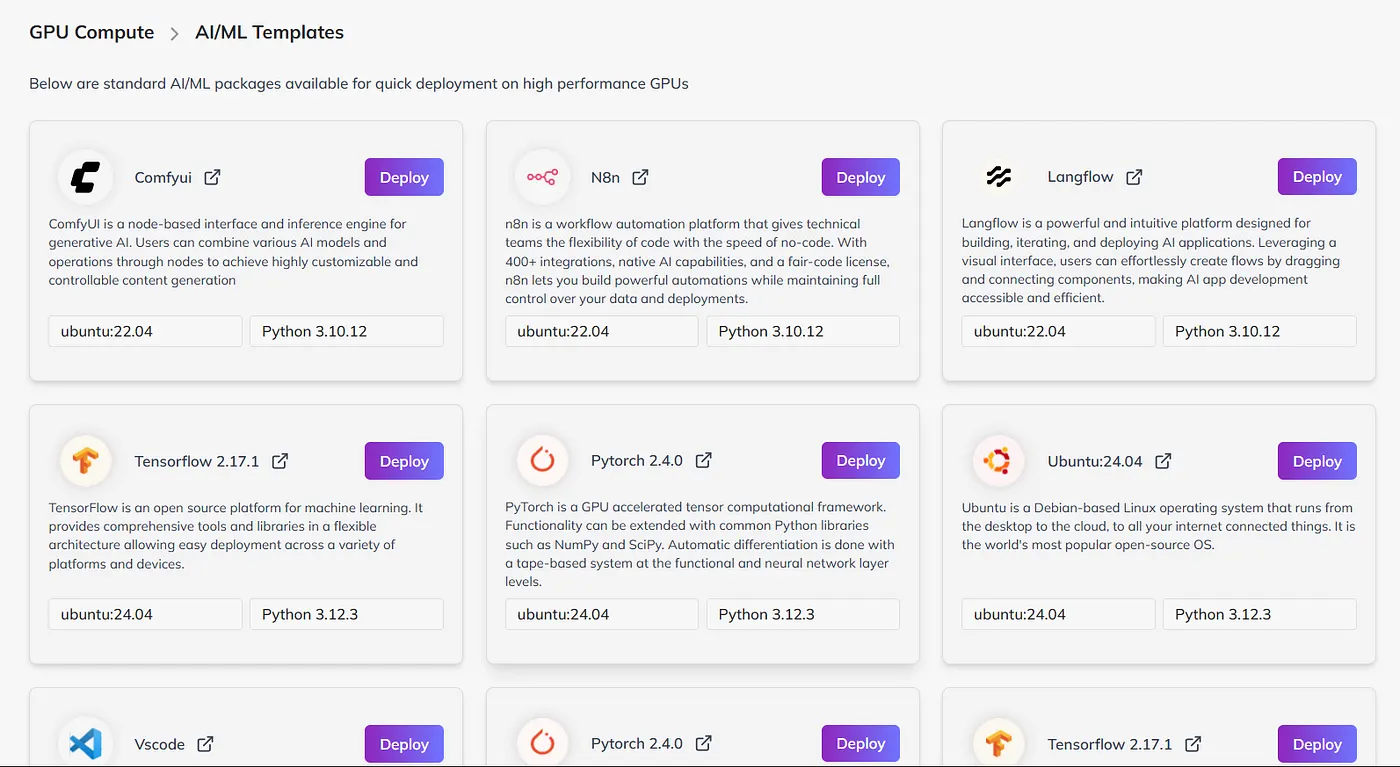
Step 1: Deploy a ComfyUI Template
First, you’ll deploy an instance using a template that pre-installs ComfyUI and the ComfyUI Manager plugin:
Deploy a GPU instance from the ComfyUI template
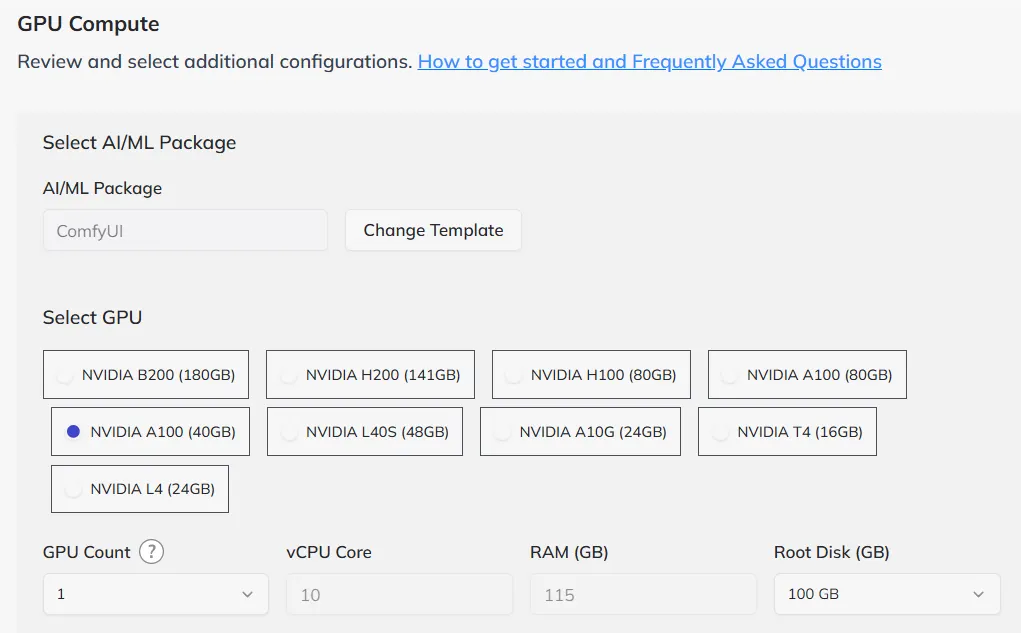
Configure your GPU instance
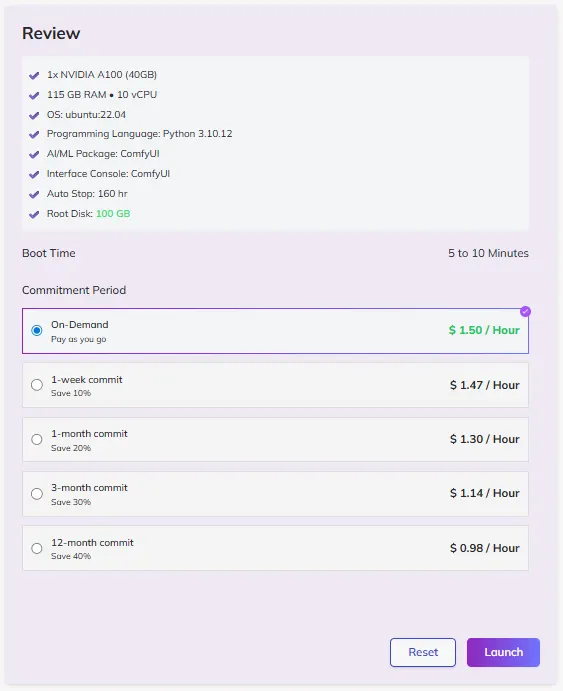
Configure your template with these settings:
- GPU selection: Select
A100or higher-end GPU recommended for optimal performance, if you have a complex workflow.
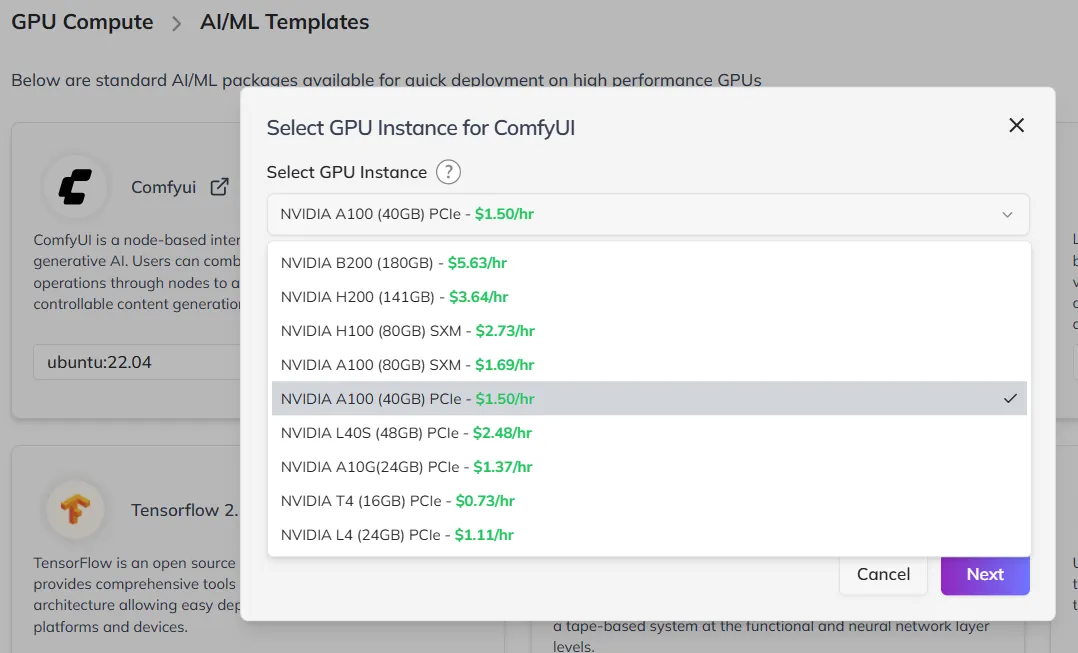
- GPU Count:You can choose the GPU count based on your model’s requirements — for example,
1GPU is sufficient forSD-1.5.
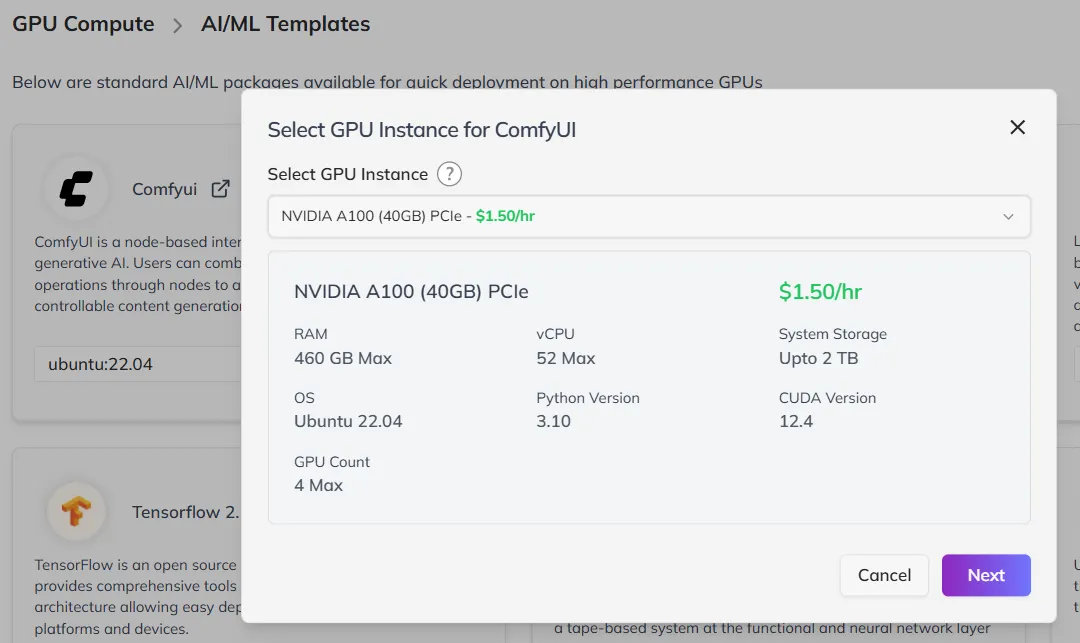
- Storage: The default root disk sizes set by the template should be
sufficientfor SD-1.5. You can add more if you want. Zoom image will be displayed
-
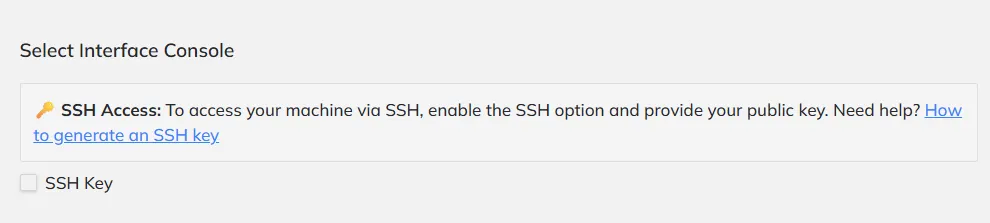
SSH Keys:You can add your generated SSH-Keys here if you want, for this tutorial it’s not required.
-
Auto Stop:Keeping it default but you can change it according to your needs.

-
Commitment Period:Select
On-Demandfor flexibility & Pay as you go.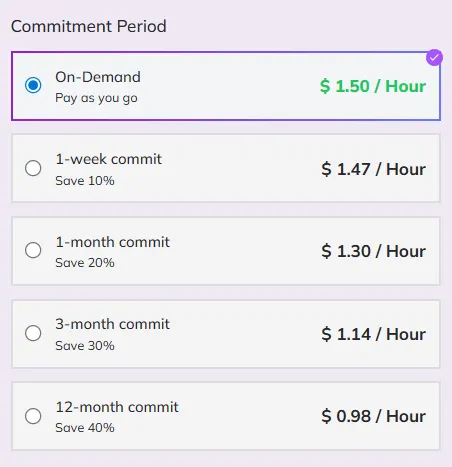
Deploy and wait
Click Launch to create your instance. This can take up to 5–10 minutes to initialize the container and start the ComfyUI HTTP service.
Step 2: Open the ComfyUI interface
Once your instance has finished initializing and up running, you can open the ComfyUI interface:
Start the ComfyUI service
- Click on the redirecting link button.
- This will open the ComfyUI interface in a new browser tab. The URL follows the format:
https://[DEPLOYED-IP]:8188.
Step 3: Load/Create the workflow
Now once the GPU instance with ComfyUI Template has been initialized and up running in your browser at port 8188.
You can create start using it by creating your own custom workflows or for this tutorial you can use this ready to be used workflow template as well.
Click here to Download the workflow
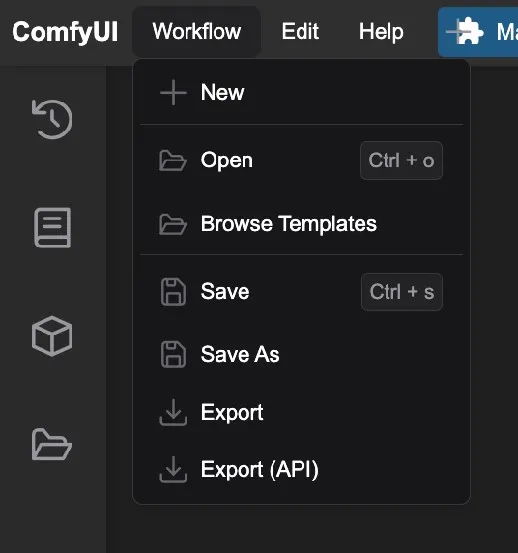
Once you download the workflow you can simply import it into the working space by clicking on the top menu Workflow and click on Open and load the downloaded Workflow.
Step 4: Install the SD-1.5 model
As soon as you load the workflow, you’ll see a popup labeled Missing Models. This happens because the template we deployed doesn’t come pre-installed with any models, so we’ll need to install them now. Rather than clicking the download button (which downloads the missing model to your local machine), use the ComfyUI Manager plugin to install the missing model directly onto your instance :
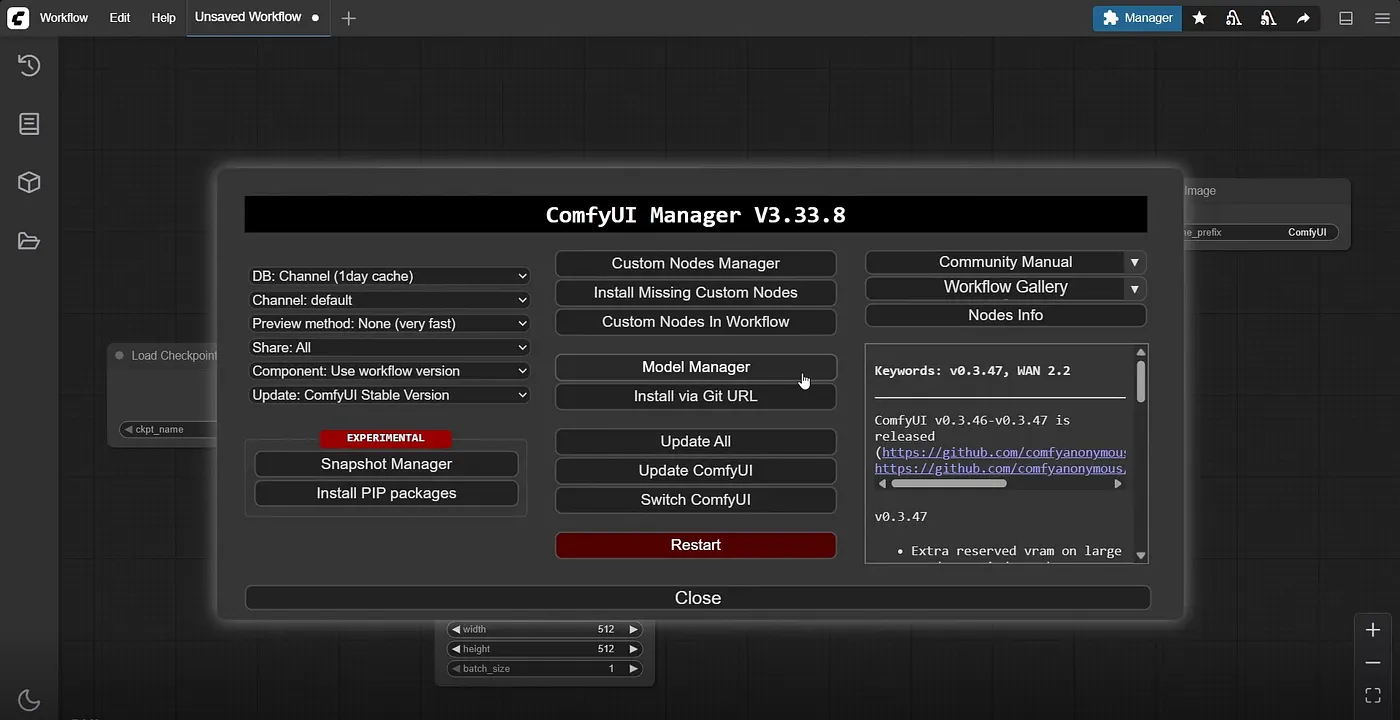
Open the ComfyUI Manager
Close the Missing Models popup by clicking the X in the top right corner. Then click Manager in the top right of the ComfyUI interface, and select Model Manager from the list of options.
Install the SD-1.5 model checkpoint
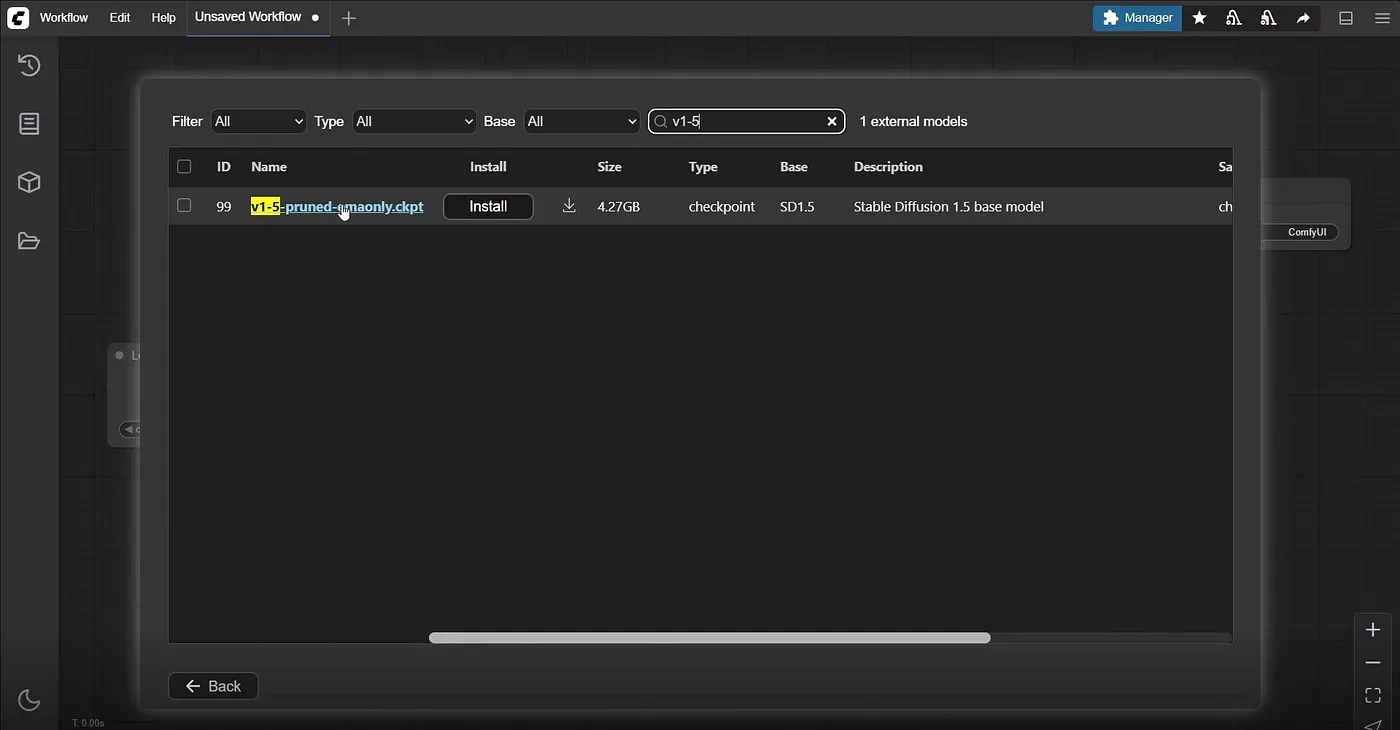
In the search bar, enter v1-5-pruned-emaonly.ckpt, then click Install.
You can also find this model checkpoint here → stable-diffusion-v1–5/stable-diffusion-v1–5
Refresh the interface
Before you can use the model, you’ll need to refresh the ComfyUI interface. You can do this by either refreshing the browser tab where it’s running, or by pressing (CTRL / CMD + R).
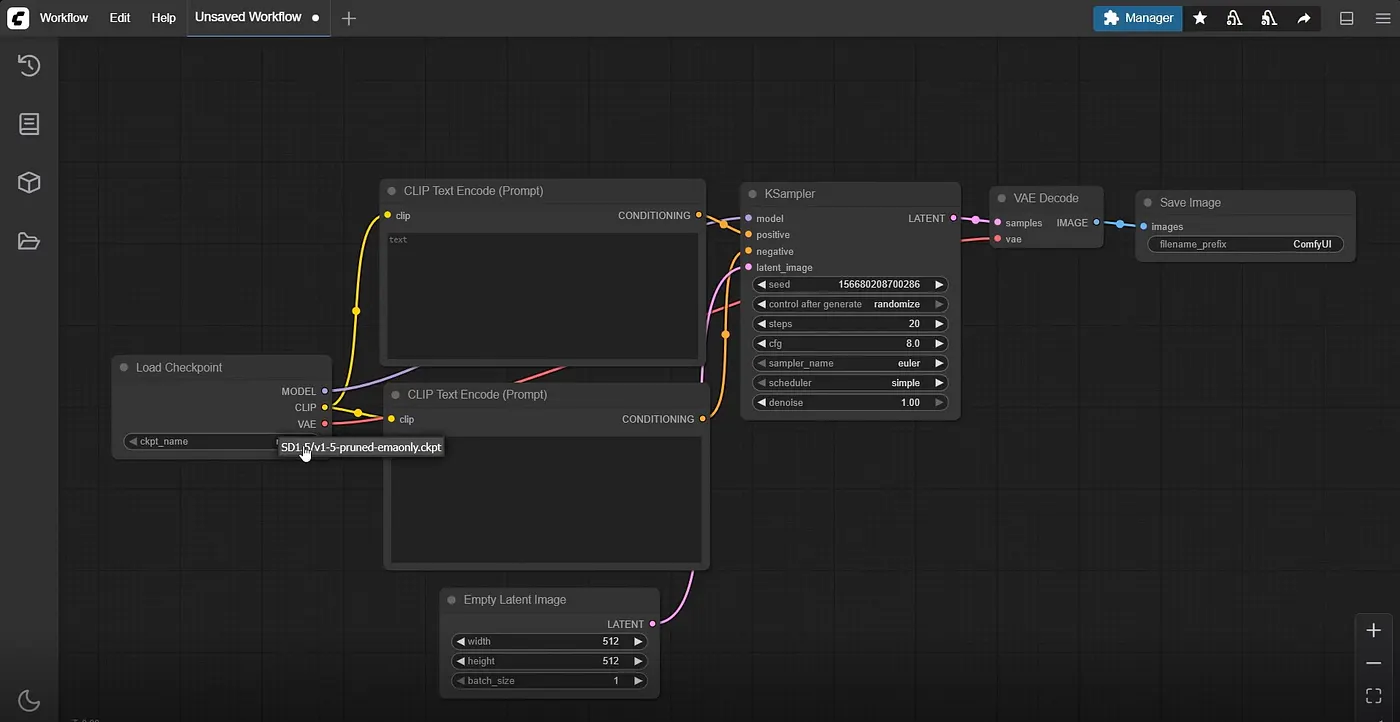
Configure the checkpoint node
Find the node labeled Load Checkpoint in the workflow. It should be the first node on the left side of the canvas. Click on the dropdown menu labeled ckpt_name and select the SD1.5/v1-5-pruned-emaonly.ckpt model checkpoint you just installed.
Step 5: Generate an image
Your workflow is now ready! Follow these steps to generate an image:
Customize your prompt
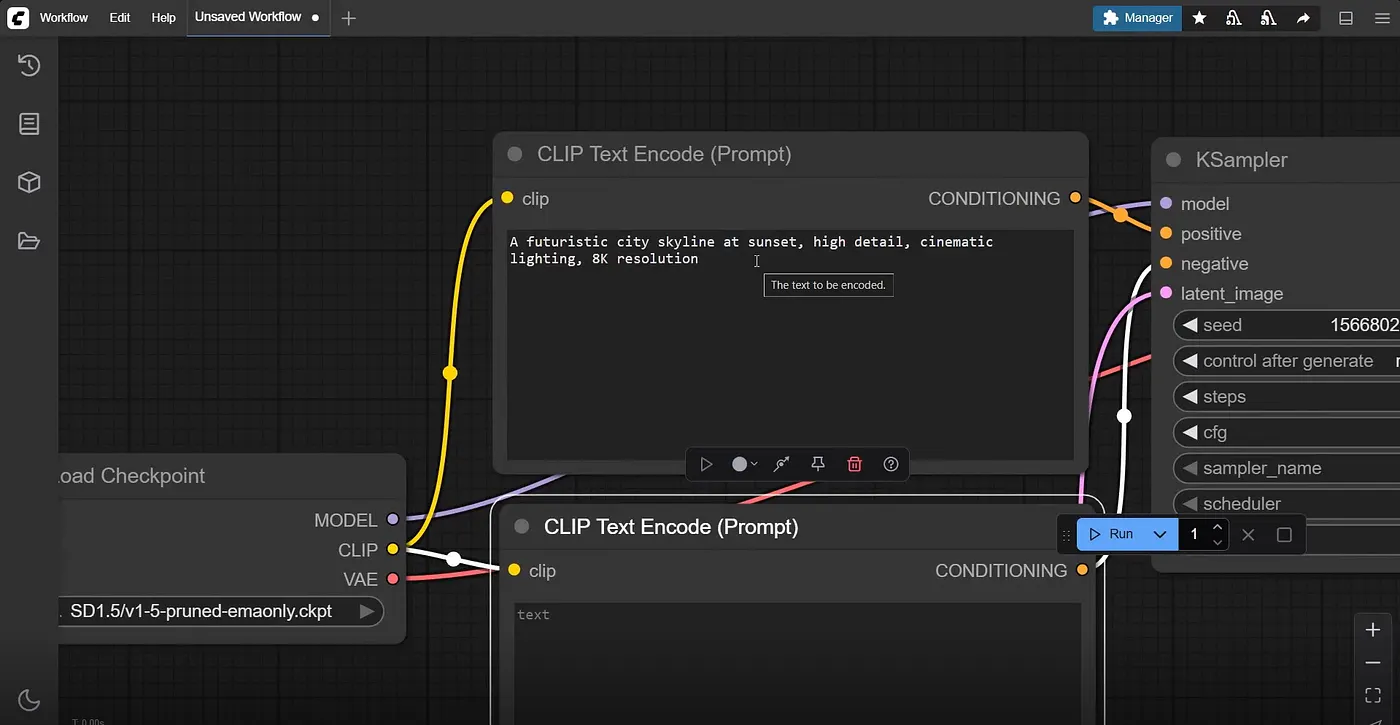
Locate the text input node labeled CLIP Text Encode (Prompt) in the workflow. Click on the text field containing the default prompt and replace it with your desired image description.
Example prompts:
- “A serene mountain landscape at sunset with a crystal clear lake.”
- “A futuristic cityscape with neon lights and flying vehicles.”
- “A detailed portrait of a robot reading a book in a library.”
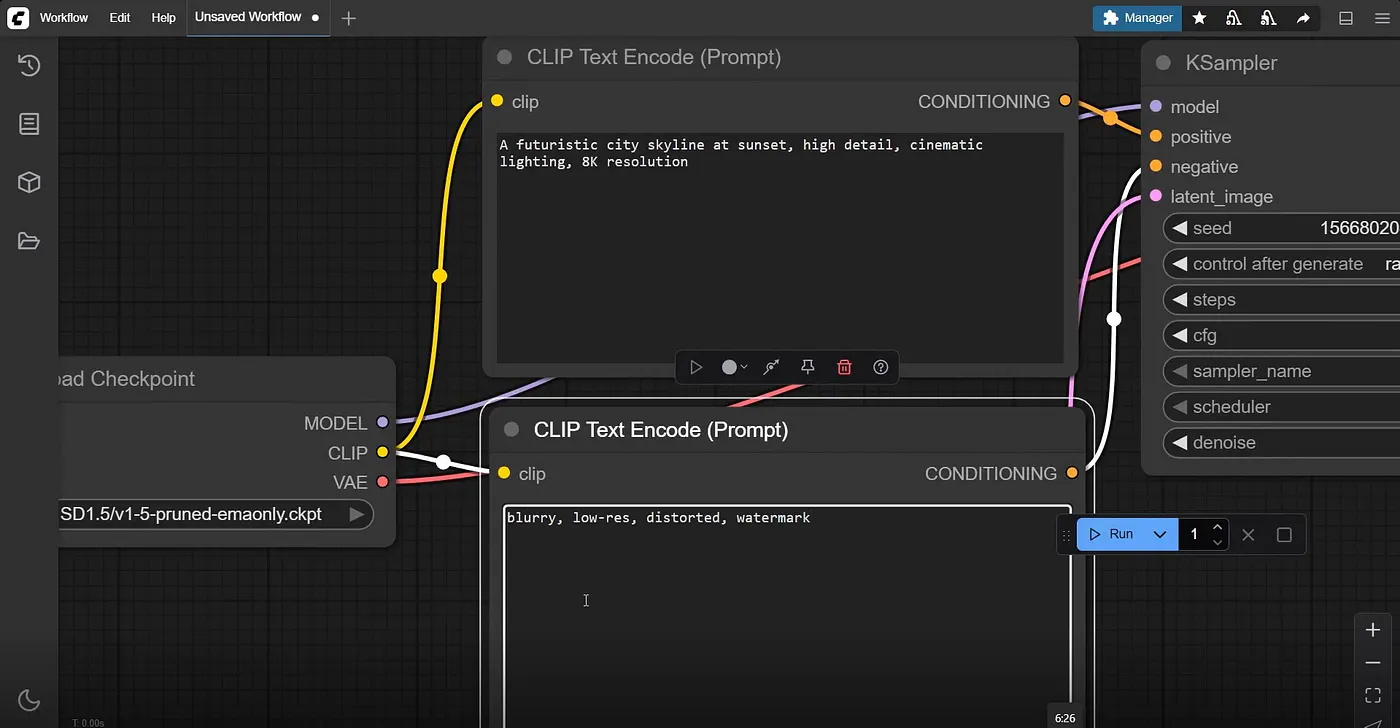
- You can even add a
Negative Prompt, this helps the model avoid unwanted elements or styles in the output, ensuring more accurate and cleaner results.

Start Generation
Click Run at the bottom of the workflow (or press Ctrl+Enter) to begin the image generation process.
-
Watch as the workflow progresses through each node:
- Text encoding.
- Model loading.
- Image generation steps.
- Final output processing.
View your result
The generated image appears in the output node when complete. Right-click the image to save it to your local machine, view it at full resolution, or copy it to your clipboard.

Congratulations! You’ve just generated your first AI-generated image wi Qubrid’s ComfyUI Template.
Follow us for more such interesting and trendy useful AI use cases.
- Ai Image Generation
- Comfyui Tutorial
- Stable Diffusion
- Text-to-Image Model